|

"Making
of Jalaniel"
Working with the Hierarchy Editor
When you are sure you want to go for the final render, one
small but very handy trick applies:
Use the Hierarchy Editor to make parts of your scene invisible and then
render the other parts.
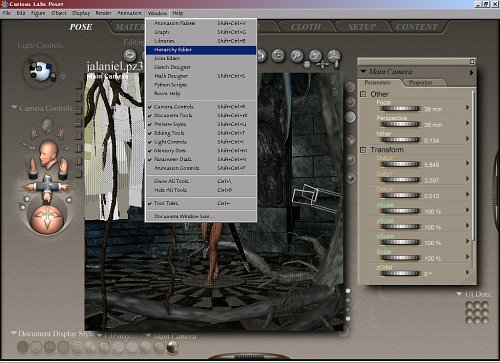
You can activate this editor by clicking on Window in the
menu bar on top. Choose Hierarchy Editor here and a new menu will open
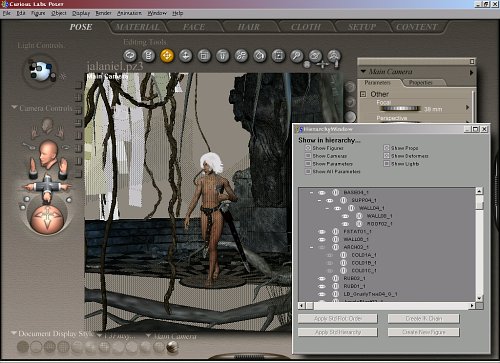
(see second picture). A hierarchic menu of props and figures in your
scene, but also parts of articulated figures, will appear. Click on the
eye icon of each part you want to make invisible. That's it.
To make them visible again, click on the grey eye icon until it appears
highlighted in white again.
I always break up my scene into elements I want to keep
together. So I render the main figure first, without anything else of
the scene around. Then, in the second steps, I render parts of the
scene.
For example the floor, the arcs in the back and sides.
Third would be part of the plantlife, the vines in the back of the
scene...
Next would be the tree in the foreground with the grass clump between
its roots.
Last are the vines in the foreground.
This 'slicing up' of the scene works well for
two reasons:
First, as I already said, it reduces rendering time.
Second, it allows you to split up your scene into individual elements
which you can later post process for certain effects like a faked depth
of field . Poser 5 is able to render a depth of field effect, but it
takes lots of time and almost never comes out like you want it to be.
So, with the help of the little 'slicing' trick, you can imitate this.
Just remember to save all your 'slices' in an image format which
supports partial transparency. .tiff or .png are just fine for this. I
mostly use .png because it preserves the transparency and I can copy
and paste the pieces without having to extract them using the alpha
channel.
  
|

